When I started looking at converting my Windows 10 Pro machine (which was running a two-disk, software RAID 1 in Windows) to an unRAID machine I didn’t find a lot of good how-to guides. Below are some guidelines and step-by-step instructions that will hopefully help if you’re in the same situation.
Basic Setup
Here’s my starting & ending setup. Yours is likely different.
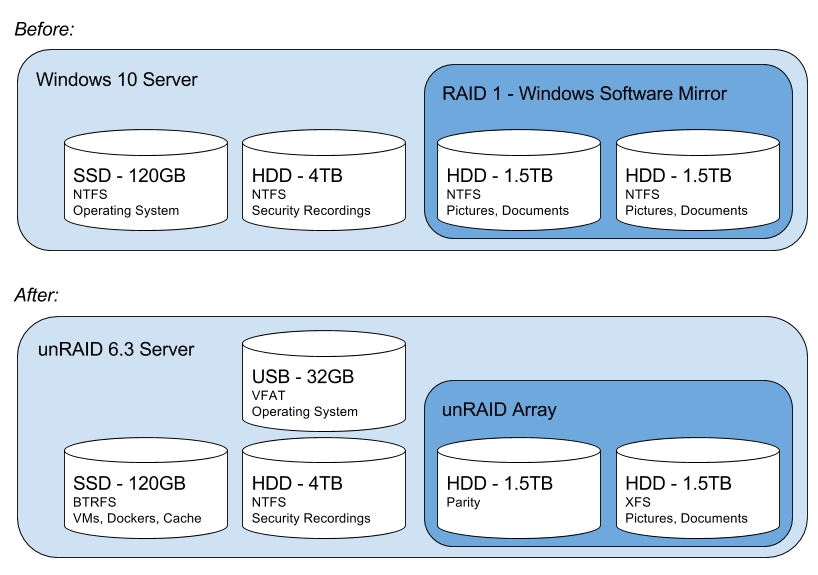
All of this is running on a 5 year old ASUS Maximus IV Gene-Z/GEN3 motherboard with an Intel Core i5-2500k processor and 16GB of RAM.
The 4TB “Security Recordings” disk is used to hold my IP cam footage from my security software – I made space on that disk to temporarily hold the data from my RAID while I was doing the upgrade. More on that below.
Before you get started, it might be good to familiarize yourself with the unRAID manual. It’ll help to have a passing understanding of what an unRAID array and share is, and it’s a pretty good reference for how to do a general unRAID installation.
Migration Steps
These instructions assume you have a Vista-or-later Windows machine with two-disks in a Windows-managed software RAID mirrored configuration.
Before you shutdown Windows
- Backup everything. This is a good time to remind yourself that RAID is not a backup strategy. You should already have a 3-2-1 Backup Strategy. If you don’t, just stop reading right here and get one. Getting a good backup is really more important than this. I like Crashplan for cloud and on-site location backups. </soapbox>
- Save your Windows license key. If you have Windows 10, this is really really important. If you took advantage of the free Windows 10 upgrade, it’s really easy to lose that free upgrade if you don’t save your license key. The easiest way to keep the key is to create an Admin user that logs in using a Microsoft Account credentials. If you’ve done that right, you should see your PC listed when you log into account.microsoft.com and look in the Devices tab. If your device isn’t there, then you should get that resolved before you move on. Once you re-install Windows later, you’ll be able to log in using the same Microsoft Account and adopt this license key on your newly installed Windows 10 machine.
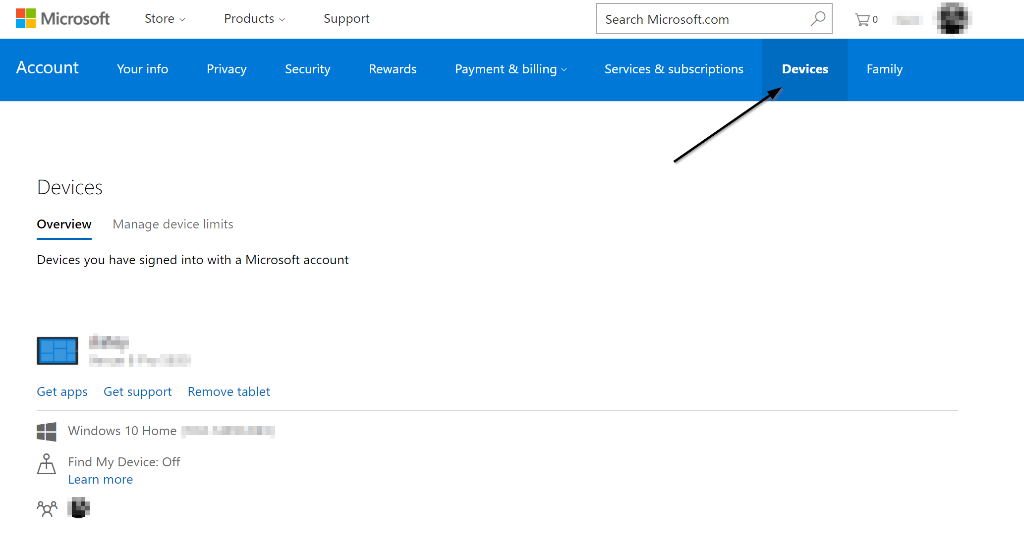
Make sure this PC is listed under your Microsoft Account Devices - Copy the data from the Windows RAID to a temporary (NTFS) drive. This has to be a drive you won’t be using as part of the initial 2-disk unRAID. We’ll use this as the source data to copy to the newly created unRAID array.In my case, I had a 4TB drive that I could copy my 1.5TB of RAID data onto temporarily so I could later use those 1.5TB drives for my unRAID array.Some tips:
- Protip 1 – make sure the temporary drive you’re copying to is not a Windows Dynamic Disk. You can check what type of disk it is by looking in the Windows Disk Management console. If it’s a Windows Dynamic Disk, unRAID won’t be able to mount it (neither can much else).
- Protip 2 – if you don’t have an extra disk big enough to hold the data from your existing array, you can use one of your disks as the source but you have to do a couple of additional steps.
- First, you have to break the Windows mirrored RAID apart (in the Windows Disk Management console, right click on the mirror, select “Break Mirrored Volume”). Do Not Remove the Mirror. Breaking it keeps the data in place on both disks. Removing it deletes the data from one of the disks.
- Second, you need to convert the disk you’ll use as the source data into a non-dynamic disk. Windows Mirrored volumes are always dynamic, so you’ll have to convert it so unRAID can read it. I used a program called TestDisk. The steps are essentially do a Create > Select Disk > select type “Intel” > Analyze > Backup > Press “Enter” > Write (Y) > Reboot. For detailed instructions, this walk through here was really useful.
- Third, when you go to create your unRAID array later, you’ll need to create an array that only has one disk (and no parity disk). After you’ve copied the data from the NTFS source disk to your new unRAID disk, then you can repurpose the source disk as your parity disk.
- Run a comparison. If you’re really paranoid, you can run a byte-by-byte comparison of the data in your source disk to your temporary disk to make sure they have the exact same data. I used Beyond Compare utilizing the binary comparison option in the settings.

Beyond Compare Settings That is. You can now power down your Windows machine for the last time. Now would be a good time to do any drive swapping you intend to do. In my case, I actually pulled out one of the 1.5TB mirror drives and installed a new 4TB drive to use as my new parity drive for unRAID (future proofing for a larger array in the future).
Install unRAID
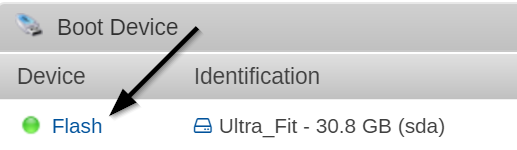
Installing unRAID should be pretty straight forward. Just follow the standard instructions to download it, get it on a USB flash drive, and boot your PC to the new OS. Once it’s loaded up, you should be able to navigate in your web browser to http://tower or http://server.ip.address.here
Setup unRAID Array & Shares
Next, setup your unRAID array and shares as you would normally. Whatever disks you assign to your array will be deleted. Be sure you pick the right disks to add to the array.
- Assuming you copied your data to a temporary drive, go ahead and setup your array with your two data disks. The array configuration is on the Main tab of the unRAID web UI.
- If you decided to use one of your Windows RAID disks as the source for your data to copy (Protip 2 above), be sure set up a single-disk array in unRAID without parity. And be sure the disk you assign to the array is the one you want to delete!
- If you plan to copy your physical installation of Windows to a Virtual Machine so you can boot and use it later, be sure not to assign your OS SSD as the cache device at this point.
- Once you get it all configured, start the array.
- Now that the Array is started, you can setup your shares. Setup your shares the way you’d like them, using whatever structure you see fit. I’ll assume you create a single share called “mirror” for these instructions.
Install Unassigned Devices & Mount Disk
The Unassigned Devices plugin will let you access the disk you’re using as your source data to copy. unRAID doesn’t normally mount drives which are not part of the array. This plugin makes that easy.
- On your unRAID web UI, navigate to Plugins > Install Plugin.
- Copy the URL below into the box for the “URL of remote plugin file or local plugin file”
https://github.com/dlandon/unassigned.devices/raw/master/unassigned.devices.plg

- Click “Install”
- Navigate to the “Main” tab – you’ll see the disks which are not part of your unRAID array listed there.
- Find the disk that contains your source data. Click the (+) next to the disk to find the partition that contains the data and select “Mount”. The mount location will be listed (e.g. /mnt/disks/Purple in my case below).

Copy your data onto your the array
Now that the array and shares are set up, and the source disk is mounted, it’s time to copy your data to the array. The main thing here is to make sure the copy is identical – that the dates and times of the files, folders, and relevant attributes get copied correctly.
- SSH into your unRAID box. If you’re unfamiliar with SSH, I recommend getting a copy of Putty and learning how to use it to log into the server. It’s pretty handy.
- Use rsync to copy the data. Here’s the command I used. Obviously, you’ll need to change the source and destination to match where you’re copying your data. The nice thing about rsync is that it will pick up where it left off it it gets interrupted.
rsync -aHAXvhW --no-compress --progress --info=progress2 --stats /mnt/disks/source/ /mnt/user/destination/
Finish setting up your unRAID
Your data should be now in it’s new home on your unRAID share. Next up you should look to complete the other installation steps in the unRAID manual if you haven’t already.
Some particularly important steps to take next:
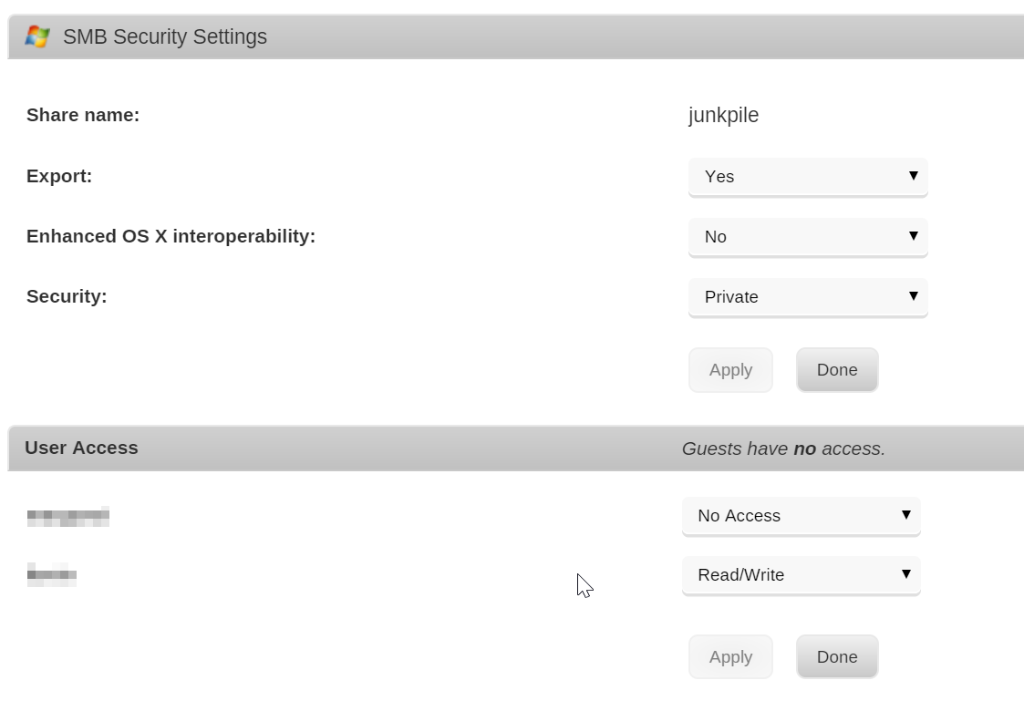
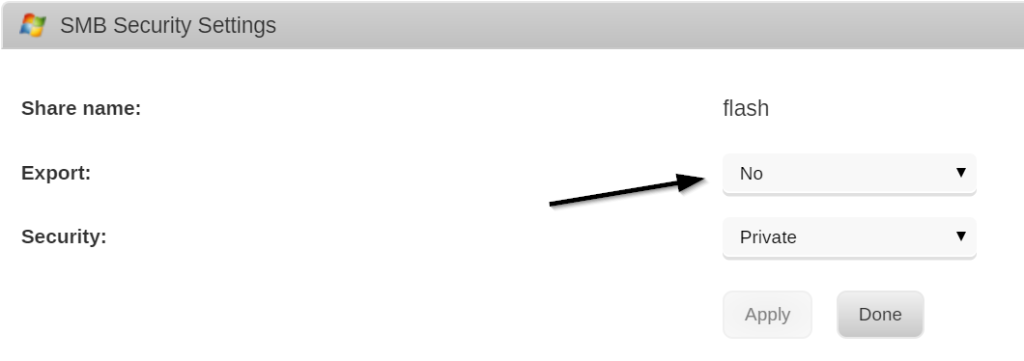
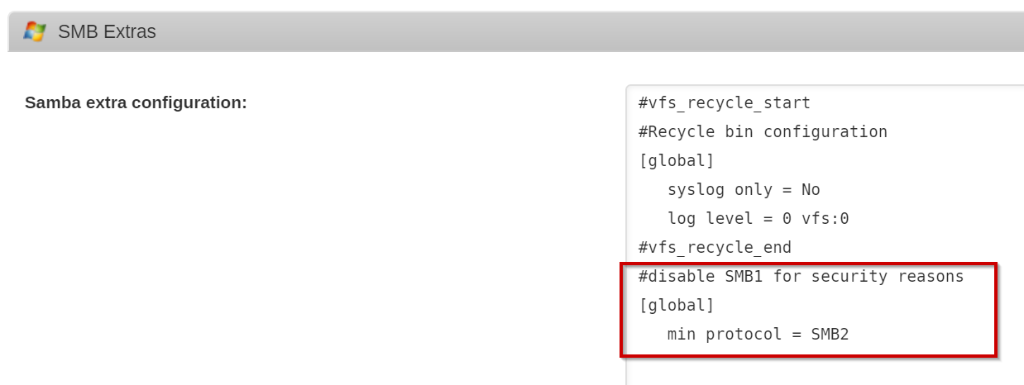
- Secure your unRAID installation. There are some security basics that are not enabled by default that you should really do.
- Setup email notifications. It’s really nice to be emailed when something is amiss.
- If you use CrashPlan, get it set up as a Docker and point it to the important places for it to backup so you don’t lose your unRAID config in the event of catastrophe.
- Assuming you want to keep your Windows install, convert that physical boot disk to a virtual machine that unRAID can host. After I did this, I repurposed my SSD as my cache drive which sped up my VMs and Dockers.
- If it makes sense for your case, set up a hard drive temperature monitoring script to set your fan speed based on hard drive heat.
There’s a lot more you can do with unRAID, obviously, but these ones I found to be pretty important as part of my initial config.
Happy unRAIDing!