I’m interested in neither of those options, so I learned how to remove the needless extra device from the mix. I’m happy with this setup because it saves me a watt or two of power at the wall plug, and it removes one more thing that could fail/need to be rebooted.
Here’s how I removed the CentryLink C2000T from my home networking setup…
Assumptions
- You have working CenturyLink fiber optic networking with only internet. If you’re using their phone or TV services, you should not follow these instructions because you likely need the CenturyLink C2000T device for those other services.
- You have the following equipment installed and working:
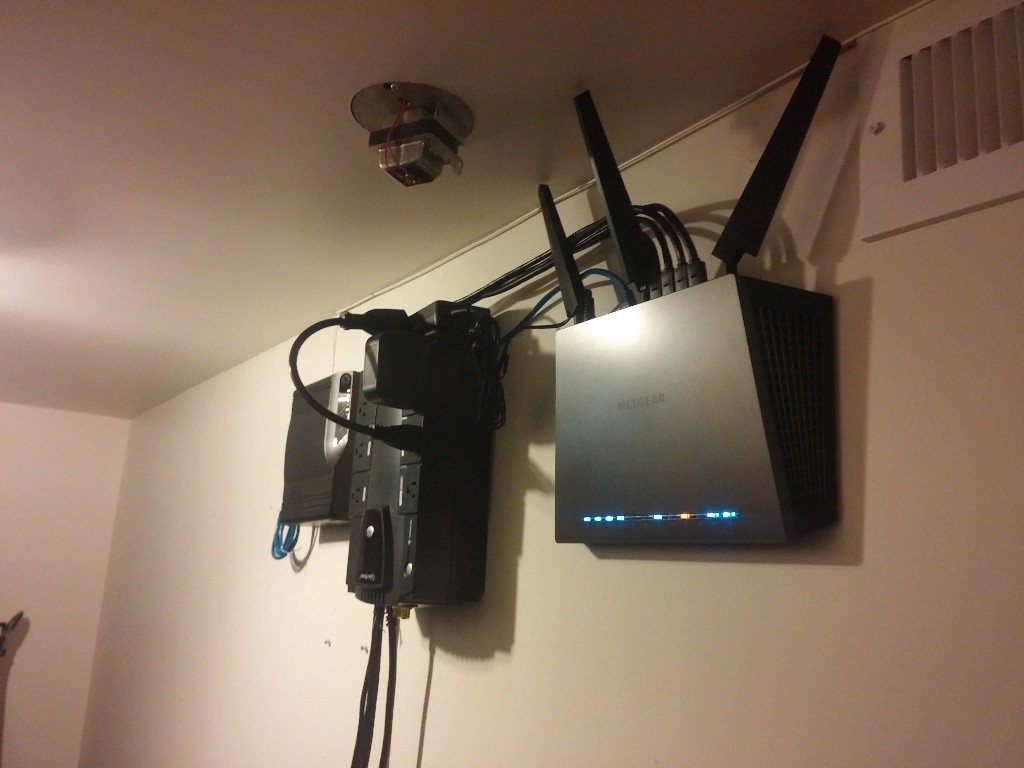
- Technicolor C2000T Modem (CenturyLink branded Wireless Router)
- Netgear Nighthawk R7000 AC1900 Wireless Router
- Calix 700GE-I Indoor ONT (it likely doesn’t matter what you have…)
- These instructions probably work on other equipment with minor modification. Give them a shot, but don’t blame me if they don’t work for you. :)
Part 1: Transparent Bridging
The first step is to get the Netgear Nighthawk doing the internet login. If this step doesn’t work, you can’t remove the C2000T. This is done by putting the C2000T into Transparent Bridging mode and then setting up the Netgear router to do the login.
Step A:
Call CentryLink and obtain your PPPoE login credentials. This is the username/password that your router uses to log you onto their internet. The C2000T has this username/password saved in it’s settings already, and you’re going to need this to get your Netgear router logged into the internet.
Step B:
Follow these instructions to set up Transparent Bridging on the C2000T. Basically you:
- Log into the C2000T (likely at http://192.168.0.1)
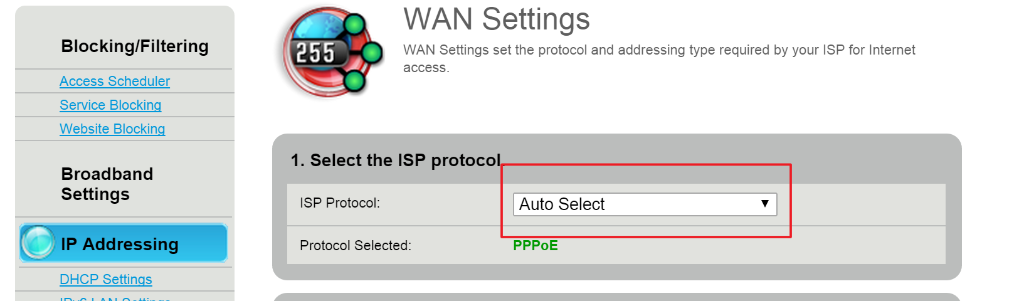
- Navigate to Advanced Setup > WAN Settings
- Change “ISP Protocol” to “Transparent Bridging”
- Click “Apply”
Step C:
Setup your Netgear Nighthawk to perform the internet PPPoE login:
- Login to your Netgear Nighthawk (likely at http://www.routerlogin.net/)
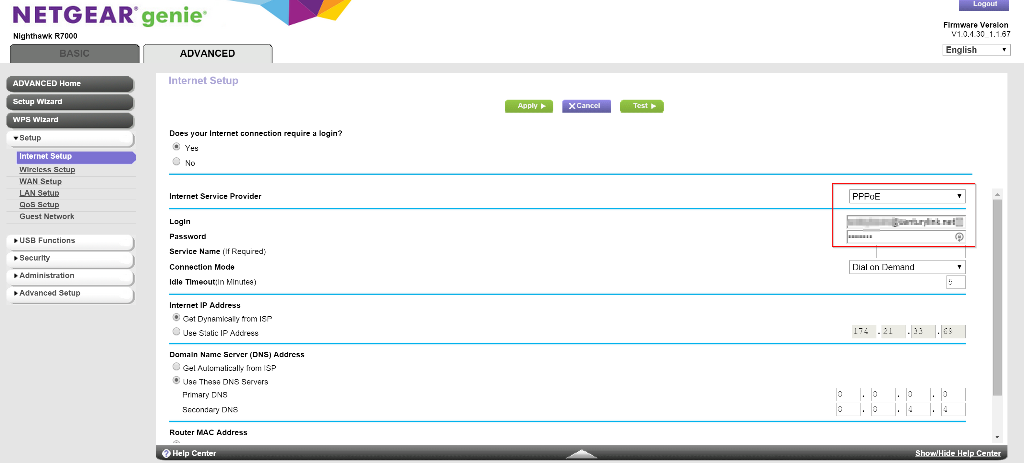
- Navigate to the Advanced Tab > Setup > Internet Setup
- Change “Does your internet setup require login?” to “Yes”
- Use the information from Step A to fill in the “Login” and “Password”. All other settings can stay the same.
- Click “Apply”.
For good measure, you should probably turn everything off, wait a few seconds, and turn them on again. You should have working internet after everything reboots. If you don’t, don’t move on to the next step until you’ve resolved the issue.
Part 2: Removing the C2000T
The last thing you need to do before removing the C2000T is to set the VLAN settings on the Netgear Nighthawk. This is because CentryLink uses VLAN settings that aren’t the same as the default on the router. (This is where the Nighthawk is such a great device… most routers don’t have these settings available to users to adjust.)
Tip: Make sure to upgrade the router’s firmware to the most recent software… the settings below are only available in the most recent updates.
Step A:
- Log back into your Netgear Nighthawk
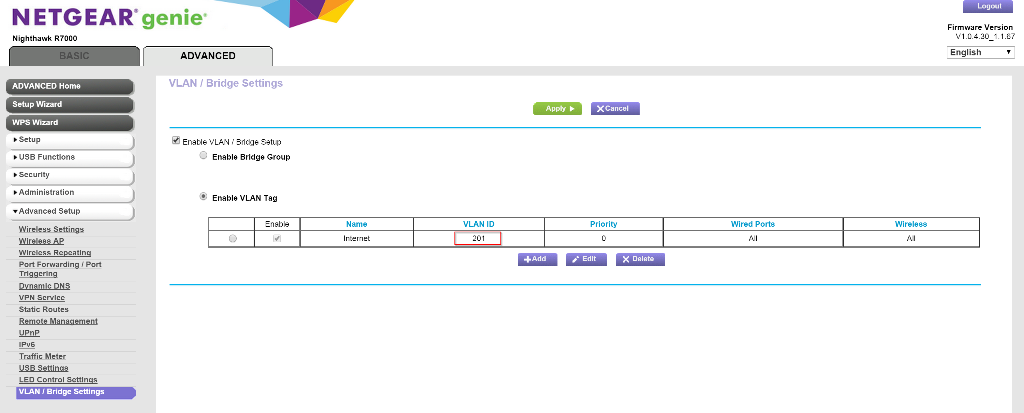
- Navigate to the Advanced Tab > Advanced Setup > VLAN / Bridge Settings
- Check the “Enable VLAN / Bridge Setup” box.
- Select “Enable VLAN Tag” if it’s not already selected.
- Select the radio button next to the “Internet” row in the table and click “Edit”
- Change the VLAN ID to “201” (it was probably set to “10”)
- Save the settings and “Apply”
At this point, you probably just lost internet… but that’s okay…
Step B:
Finally, the last step is to disconnect the C2000T and wire the Netgear Router directly into the ONT.
IMPORTANT: Make absolutely sure you plug the Netgear Nighthawk router into the same port as the C2000T was plugged into on the ONT. Only one port of your ONT is set up to work – no other port will do.
Conclusion
I hope that works for you. It took me a bit of searching to figure out how to do this, so I thought I’d pass this along. Some sources that were helpful to me:
- http://internethelp.centurylink.com/internethelp/modem-c2000t-adv-bridging-q.html
- http://kb.netgear.com/app/answers/detail/a_id/25724/~/vlan-tagging-setup-for-nighthawk-router
- https://forum.pfsense.org/index.php?PHPSESSID=00ktarsglfl0j7kgb9fnn426j5&topic=92718.15
Update 11/13/2015
- Lots of folks have commented that they can’t get the full gigabit speeds with this configuration on the Nighthawk router.
- 450Mbps appears to be the max on the Netgear Firmware for the R7000.
- I’m only paying for 40 Mbps up and 20 Mbps down, and I easily get those speeds with this configuration.
- Richard (in the comments below) was able to get 900+Mbps up/down using an ASUS RT-AC87 router with the ASUSWRT-MERLIN firmware. Although others have said they haven’t been able to repeat that success entirely. YMMV.
- Take a look through the comments to see how others have configured their networks to try.
- 450Mbps appears to be the max on the Netgear Firmware for the R7000.
- Prism (TV) can be set up to work in this configuration. I don’t have Prism myself, but others in the comments have gotten to work
- On ASUS routers with these settings: http://i.imgur.com/vfBqOJj.png (thanks, Dylan!)
- On the R7000, by making sure WAN Setup > Disable IGMP proxying is not set. (thanks, Steven!)
I’m so glad I found this blog. I’m a Centurylink fiber customer who was still using the original modem/router in bridge mode in between the ONT and my Orbi router from the initial install years ago. I just upgraded my Netgear router/satellite from the Orbi 850 to the Orbi 770. Even with these new hardware releases the VLAN tagging instructions and screenshots worked perfectly. I’m finally free from the extra Centurylink modem in between the ONT and Orbi router. Thank you!
I’m about to cancel. I don’t have a bridge option in their garbage calix u6 router (damn that thing is SO crippled. Doesn’t even support WAPx-Enterprise or static routes)
My pfSense does have VLAN tagging. If this all fails, I’ll stick with cable. DimWitSpeed’s tech support is clueless, and just read the reboot modem script.
https://calixwifilog.com/how-to-access-calix-router-in-bridge-mode/
hope this helps?
https://www.reddit.com/r/HomeNetworking/comments/12fxtx7/calix_gigaspire_ont_in_bridge_or_passthrough_mode/
this also should help