M and I have a great webcam setup for our home for the lil nugget – it’s a simple DLink webcam that costs less than $50. So much cheaper than an expensive, baby-specific monitor.
We use a tablet and our phones to check in on the baby using this great app (tinyCam Monitor Pro) – the best feature is that you can turn off your phone and still have the audio alert you to the baby starts making noise louder than the ambient room noise (i.e. squelch the volume & not have to listen all the time to the white noise we pump into the nugget’s ears to keep him happily asleep).
The problem is that we can’t view the webcam from outside the house securely. DLink provides an app that lets you view the camera when you’re not on your home WiFi, but it does so in an insecure way – basically broadcasting the video feed for anyone to intercept and see. That creeps me out.
So we needed a way to get secure access from our phones, anywhere in the world, back into our home network so we could see the camera. Well, need is a strong term… desire, perhaps.
This is what Virtual Private Networks (VPN) were built for – I’ll walk through how I set one up for our home.
This is a tech how-to. It’ll take an afternoon or a weekend to complete the project. It was a pain in the butt for me – I’m writing these instructions down in the hopes I can save someone else some time.
Instructions
What we’re trying to do.
Allow secure access to things inside your home’s network from anywhere in the world.
Specifically, enabling our Android phones and Windows laptops to access our home network, including our baby camera (and file shares and whatever else we want) while we’re not at home. It’s also a great way to provide yourself secure web browsing when you’re away from home.
These instructions are focused on our Android phones (both running Lollipop), and our Windows 10 laptops. They’ll probably work for your Mac/iPhone as well.
These instructions are specific to setting up a Raspberry Pi Linux machine with OpenVPN software, and then connecting to it from the outside world.
What you’ll need.
- Raspberry Pi – It’s basically a very cheap, power efficient, simple computer. I used an older “Model B”, but there are newer ones out there.
- All the stuff to make the Raspberry Pi run:
- Keyboard
- SD card
- USB power supply
- Ethernet
- HDMI cable
You can buy almost all of it as a kit, easy enough for under $70.
Tip: you can actually run an OpenVPN server on any computer that’s always running within your home network. I used the Raspberry Pi because it’s small, cheap, doesn’t use a lot of power, and has ‘good enough’ performance for what I need. If you need amazing performance, you’ll definitely want a newer Raspberry Pi 2.
What I assume you already have.
- A computer
- Broadband internet and a home network router
- Time
- Willingness to make some mistakes and learn
What I don’t assume.
I don’t assume you know anything about Linux, Raspberry Pi, Home Networking, etc. Undoubtedly I may leave out some critical step or you may encounter something different. If you do encounter trouble, I’m sorry. Leave a comment and maybe I can help. Hopefully the Internet has both of our backs.
Step 1) Get that Raspberry Pi Setup
There are some great guides out there to getting the Raspberry Pi computer up and running. I recommend going here to get started and following their instructions to setup your Raspberry Pi.
You’ll know you’re done with this step when you can successfully log in to the Raspberry Pi’s terminal, which is the text interface where we’ll be doing most of our work.
This is the only step in the process that I’ll send you off to somewhere else to do something… the remainder of the instructions here are self-contained.
Step 2) Make Raspberry Pi Secure
Out of the box, the Raspberry Pi has a couple of default passwords. It’s a really good idea to change them.
First, change the super user password by running this commands on the Raspberry Pi terminal:
sudo passwd
Follow the prompts to enter a new password. Change the password to something very secure. This changes the ‘root’ user’s password. ‘root’ is very special in Linux – it’s the user who has full control of everything on the machine. By default, other users don’t have full control of the machine. The sudo command here is a way to say, let me temporarily become the root user so I can do something privileged. You’ll see that command a lot.
Next run the following command:
passwd
This changes the ‘pi’ user’s password. It can be the same (or different) from the root user’s password. That’s up to you.
Step 3) Setup SSH
Up until this point, you haven’t had to do anything on the network. If you haven’t done so already, plug the Raspberry Pi into your internet router because we’re about to go online.
3.1 Enable SSH on the Raspberry Pi
SSH is a tool that allows you to connect securely between two computers. By default, the Raspberry Pi doesn’t have SSH turned on, so we need to do that so you can connect to it.
In Raspberry Pi’s command terminal, run
sudo raspi-config
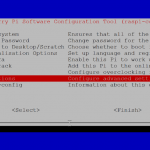
Navigate to Advanced Options > SSH and choose Enable. Then you can exit.
3.2 Find out your Raspberry Pi’s IP Address
Internet Protocol (IP) addresses are how computers know how to find each other on the internet. We need to know the Raspberry Pi’s IP address so we can log into it from our computer. Run this command and take note of the ‘inet address’ displayed – it’s probably something like 192.168.1.35.
ifconfig
3.3 Get an SSH client & log into your Pi
This next step depends on what kind of computer you have.
Apple Mac
If you have a Mac, you can open the Terminal app (/Applications/Utilities/), and type the following command, changing the bold RaspberrypiIPAddress part of the line with the IP address you got in the previous step.
ssh pi@RaspberryPiIPAddress
For example:
ssh pi@192.168.1.50
Windows
If you’re on Windows, you’ll need to download an SSH client. I recommend putty.exe, because it’s small and easy to use.
Once you download it, run the program and use your IP address to connect to your Pi.
When you connect, you will be prompted for your user name (“pi”) and your password (the one you set in Step 2).
Now that you’re logged in from your computer, let’s just keep working from there.
Step 4) Update/Install Raspberry Pi’s Software
It’s always a good idea to run the most up to date software to make sure you’re protected against vulnerabilities that may have been found & fixed. It’s pretty easy to do it on Linux. On the Raspberry Pi, you just run these two commands:
sudo apt-get update
sudo apt-get upgrade
There’s that sudo again… you need to be the root user to be able to update the machine. The first command updates the internal knowledge about what software is ready to be upgraded, the second command actually does the upgrade. This can take a few minutes. Go grab a beverage if you don’t have one.
Next you’ll want to make sure the Raspberry Pi’s firmware is up to date. That can be done with the following two commands:
sudo apt-get install rpi-update
sudo rpi-update
The last piece of software we’re going to install is the OpenVPN software. That’s done with the following command:
sudo apt-get install openvpn
Last, but not least, it’s probably time to reboot your Raspberry Pi. You can do that with the following command:
sudo reboot
Once it has rebooted, you can SSH back in (i.e. log in) again using the instructions from the end of step 3 above.
You should be all set with the basic software install now. We’ll come back to configuring it later.
Step 5) Setup Static Internet Addresses
In order for you to be able to reach your home from anywhere else in the universe, you need to know what IP address to look up. IP addresses are how computers find each other on the internet. It’s how we logged into your Raspberry Pi from your computer in Step 3. Unfortunately, they can change over time so we need to fix up a few things. If you don’t know much about them, don’t worry…
5.1) Set up a personal domain name for yourself
Your home network has an External IP address – this is the single address that represents your home router. Your external IP address changes a lot – pretty much every time you reboot your router – so it’s a really good idea to use a service that can be updated to always know your external IP address. This is done through the domain name system. The domain name system (DNS) is the way that Internet domain names are located and translated into Internet Protocol addresses. A domain name is a meaningful and easy-to-remember “handle” for an Internet address.
There are a lot of services out there where you can create your own Domain Name and point it back to your home network. I like https://freedns.afraid.org/ because it’s free. Follow the links in the steps below to get a DNS setup for your home:
- Make your account -> freedns.afraid.org -> Signup
- Make a DNS record (subdomains -> Add -> Save)
- Pick any subdomain name and domain that you want. This will be the address you use to find your way home.
- Leave all the other options as default.
You’ll see your entry appear in the subdomains page when you’re done. Write down your full domain name (example: yoursubdomain.afraid.org). We’re going to need it later.
5.2 Update your domain with your external IP address
Next you need to tell your Raspberry Pi to periodically update freedns.afraid.org so that it knows your current External IP address, in case it changes in the future. We’ll do that by using a tool called crontab which is designed to do things like this periodically.
- Go to http://freedns.afraid.org/dynamic/
- Look for the link that says ‘quick cron example’ towards the bottom of the page. Click the link.
- At the very bottom of the page, you’ll see a line that looks like this:
3,8,13,18,23,28,33,38,43,48,53,58 * * * * sleep 27 ; wget --no-check-certificate -O - https://freedns.afraid.org/dynamic/update.php?blahblahblahblah >> /tmp/freedns_subdomain_domain_com.log 2>&1 &
- Copy the line from the bottom of your ‘quick cron example’.
- On your Raspberry Pi’s SSH terminal, type the following command.
crontab -e
This will open the nano editor. This is the default text file editor on Raspberry Pi.
- Scroll to the bottom of the file (using your arrow keys on your keyboard) & paste the text from step 3 into the file.
- Hint: on Windows, right clicking in the PuTTY window will paste text under your cursor.
- Save the file by pressing Ctrl-O, and then Ctrl-X to exit.
Now crontab will run every now and then and tell your DNS service your external IP address. You now can always reach your home network while you’re out in the world.
5.3 Internal Static IP Addresses & Port Forwarding
In the previous steps, we setup a domain name so that you can always reach your home network. Once we can reach the home network, however, we still need to make it possible to reach the Raspberry Pi machine which is behind your home router’s firewall.
In these next steps, you’re going to have to configure your home router. Unfortunately, every home router is different so I can’t give you specific advice. I’ll show you what it looks like on my router in hopes it’ll help you find the same options on your own home router. I suggest searching the web for the model of your router and keywords like ‘static ip address’ and ‘port forwarding’ to learn about your specific router.
Set a static IP Address for your Pi
- Login to your router in a browser (likely at http://www.routerlogin.net/)
- Find the place where you can set static IP addresses, sometimes called “Address Reservation”. In my router that’s under the Advanced tab under Setup > LAN Setup.

- When you find the right place in your router, you should be able to set a static IP address associated with the Raspberry Pi in your router. That makes sure your IP address of the Pi never changes in the future. Note that you’re looking to set up a static IP for the IP address you found in Step 3.2 above, and the MAC address in the entry should match the HWAddr you saw in that same step by running ifconfig.

Set up port-forwarding to your Pi
Next, we need to make it possible for external internet traffic to reach the Raspberry Pi inside your home network. To do so, we forward a port from the external network to the internal network. This is basically punching a tiny, very specific hole in the defenses of your home network to let a particular kind of traffic in to a specific machine inside the firewall. Again, every router is different… yours will likely have different instructions. I suggest searching the web here.
- Log into your router if you’re not already.
- Navigate to the Port Forwarding configuration. In my router, it’s under the Advanced tab under Advanced Setup > Port Forwarding / Port Triggering.
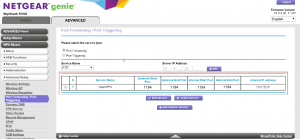
- Once you find the right place, you want to set up a port forwarding rule with the following parameters:
- Protocol: UDP
- External Port: 1194
- Internal Port: 1194
- Name: OpenVPN (if required)
Hopefully that’s enough information to get things setup right.
You can test that it’s all setup correctly later when we get to setting up the OpenVPN software.
Step 6) Setup the OpenVPN Server on your Raspberry Pi
Finally! We get around to some software configuration on the Pi. This is where we make the magic happen.
6.1 Configuration of easy-rsa
In order to securely connect between two computers, OpenVPN uses keys which provide the authentication and security between the two computers. These keys that we’re about to generate are the shared secrets that make it possible for you to connect from the outside world. It’s important that you protect the keys were about to generate and make sure nobody gets access to them, or they could get access to your network.
Whew. Warnings over. Let’s do this.
OpenVPN comes with a tool called easy-rsa that makes creating the keys simple.
Go back to your SSH terminal and log into your Pi if you’re not already logged in.
From the command prompt, do the following actions:
- Move the easy-rsa directory to somewhere better – this is a good idea to make sure it doesn’t get overwritten/changed in further upgrades.
sudo cp -r /usr/share/doc/openvpn/examples/easy-rsa/2.0 /etc/openvpn/easy-rsa
- Make some changes to the easy-rsa configuration
- Open the easy-rsa configuration file:
cd /etc/openvpn/easy-rsa
nano vars
- Inside the vars file, find the line that starts with “export EASY_RSA=” and replace it with:
export EASY_RSA=”/etc/openvpn/easy-rsa”
- Make the key strength higher by making it longer. Find the line that starts with “export KEY_SIZE” and replace it with:
export KEY_SIZE=2048
- There are other things you can change here if you wish, like the organization name, email, etc. but you really don’t have to.
- Save and close the file (Ctrl-O, Ctrl-X)
- Open the easy-rsa configuration file:
6.2 Generating keys
Now that easy-rsa is set up, we can generate keys.
Generating Server Keys
Run the following commands to generate the keys for your Raspberry Pi server:
cd /etc/openvpn/easy-rsa
. ./vars
./clean-all
./build-ca
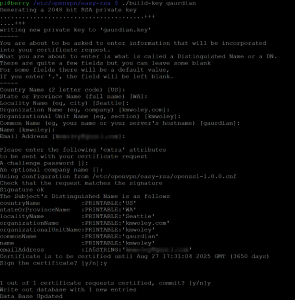
The last command will ask you a few questions. You only have to enter a something into the “Common Name” field (the name of your server would be a fine choice). At the end, you should say ‘y’ to all the questions.
Next, we build the keys for the server:
./build-key-server server
This will ask you a few questions again. All of the other questions you can answer by pressing the Enter key.
Finally, we have just a couple more keys to generate.
openvpn --genkey --secret /etc/openvpn/easy-rsa/keys/ta.key
./build-dh
That last command will take a very, very long time. Go get a beverage and check back every 20 min or so to see if it’s done.
Generating Client Keys
A client is a machine that’s going to be connecting to our Raspberry Pi OpenVPN server. We need to make unique keys for each of those clients. The build-key command creates a key for an individual computer. Run the commands below to generate a key for a remote client – replace ‘clientname’ with a name that you want to associate with the phone or computer.
cd /etc/openvpn/easy-rsa
./build-key clientname
Suppose you had two phones (phone1, phone2) and a Windows machine (computer1) you want to create keys for – you’d run the following command, once for each device.
./build-key phone1
./build-key phone2
./build-key computer1
Run build-key for each device that’ll be connecting to the VPN. You can name them whatever you want. When you get done, you’ll have all the keys generated and located in /etc/openvpn/easy-rsa/keys
Tip: if you ever need to add a new client, you can always come back and run ./build-key for that new computer in the future.
6.4 Configure the OpenVPN Server
We now have to tell the OpenVPN server how it should behave. All of the settings for OpenVPN live in configuration files. We need to create one.
Open a text file editor and create the server.conf file for OpenVPN:
nano /etc/openvpn/server.conf
Cut and paste the following text into the file you just opened:
# the same port you configured on your router for forwarding
port 1194

# basic OpenVPN configuration
proto udp
dev tun

# key and authentication configuration
ca /etc/openvpn/easy-rsa/keys/ca.crt
cert /etc/openvpn/easy-rsa/keys/server.crt
key /etc/openvpn/easy-rsa/keys/server.key # This file should be kept secret
dh /etc/openvpn/easy-rsa/keys/dh2048.pem
tls-auth /etc/openvpn/easy-rsa/keys/ta.key 0 # This file should be kept secret

# configuration of the VPN's IP addresses
server 10.8.0.0 255.255.255.0
ifconfig-pool-persist /etc/openvpn/easy-rsa/ipp.txt

# Add route to Client routing table for the OpenVPN Server
push "route 10.8.0.1 255.255.255.255"

# Add route to Client routing table for the OpenVPN Subnet
push "route 10.8.0.0 255.255.255.0"

push "redirect-gateway def1 bypass-dhcp"
keepalive 10 120

# encryption configuration
cipher AES-256-CBC
auth SHA512
tls-cipher DHE-RSA-AES256-SHA

# enable compression of the data traffic
comp-lzo

# The maximum number of concurrently connected
# clients we want to allow.
max-clients 5

user nobody
group nogroup

persist-key
persist-tun

status /var/log/openvpn-status.log 300
log /var/log/openvpn.log
verb 1
mute 20
When you’re done, save and close the file (Ctrl-O, Ctrl-X).
Now that the server is configured, you can (re)start the OpenVPN service:
sudo service openvpn restart
You should see a success message that looks similar to this:
6.5) Create the Client configuration files
There are two different ways you can set up your clients. One is to direct all Internet traffic through the OpenVPN server from the client – this is called a “full tunnel” VPN because you’re sending all of the traffic through the OpenVPN secure tunnel to your home network. The second way is to direct only the Internet traffic to the OpenVPN server that needs to reach inside your home network – this is called a “split tunnel” VPN configuration, since the traffic has a different route depending on if it’s going to your home network or not.
Do I have to choose now?
No! You can actually have both tunnel types set up on your clients, and pick each time you connect. This is what I do – 90% of the time I use the split tunnel because I’m at work or at a family member’s house and I trust the network. I only use the full tunnel when I’m internet banking from a public place like a coffee shop.
So, you can create both of the files described below or just the one you want. We’ll move them to the client later.
Full Tunnel Configuration
Using the ‘full tunnel’ configuration is a good idea if you want to protect 100% of all traffic coming out of the client device – this is how people in China and other heavily regulated countries get access to the real Internet, and how you can connect securely from an untrusted WiFi at a seedy coffee shop. By sending all traffic through securely though your home network, you get the security/trust level of your home network. The disadvantage here can be performance, since you’re going to be limited by the Raspberry Pi’s bandwidth and the bandwidth of your home network.
Below, we’ll create the client configuration file for a full tunnel connection and save them on your Raspberry Pi.
Open a text file editor and create the client-full.ovpn file for OpenVPN:
nano /etc/openvpn/client-full.ovpn
Cut and paste the following text into the file you just opened:
# Full Tunnel OpenVPN client configuration
client
dev tun
proto udp

# you must change 'subdomain.domain.com'
# to your home DNS entry
remote subdomain.domain.com 1194

# Keep trying indefinitely to resolve the host name
# of the OpenVPN server.
resolv-retry infinite

nobind
persist-key
persist-tun

# key & authentication configuration
ca ca.crt
cert client.crt
key client.key
remote-cert-tls server
tls-auth ta.key 1

# encryption configuration
cipher AES-256-CBC
auth SHA512

# enable compression of the data traffic
comp-lzo

# logging setup
mute-replay-warnings
verb 3
mute 20
Important! You need to change the subdomain.domain.com in the file to the DNS address you created in Step 5.2. This is how the client knows what computer to connect to when it opens up the tunnel.
When you’re done, save the file and exit nano (Ctrl-O, Ctrl-X).
Split Tunnel Configuration
Using a ‘split tunnel’ configuration is good if you’re not worried about the security of your general Internet traffic, and you just want to be able to securely access things that are inside your home network.
Below, we’ll create the client configuration file for a full tunnel connection and save them on your Raspberry Pi.
Open a text file editor and create the client-split.ovpn file for OpenVPN:
nano /etc/openvpn/client-split.ovpn
Cut and paste the following text into the file you just opened:
# Split Tunnel OpenVPN client configuration
client
dev tun
proto udp

# you must change 'subdomain.domain.com'
# to your home DNS entry
remote subdomain.domain.com 1194

# ignore the server's instructions about routing
# all data to the OpenVPN server
route-nopull

# direct this client to route only a subset of traffic
# to the OpenVPN server through the tunnel
#
# you must change 'INTERNAL_HOME_ADDRESS' to your
# home's IP address range.
route INTERNAL_HOME_ADDRESS 255.255.255.0

# Keep trying indefinitely to resolve the host name
# of the OpenVPN server.
resolv-retry infinite

nobind
persist-key
persist-tun

# key & authentication configuration
ca ca.crt
cert client.crt
key client.key
remote-cert-tls server
tls-auth ta.key 1

# encryption configuration
cipher AES-256-CBC
auth SHA512

# enable compression of the data traffic
comp-lzo

# logging setup
mute-replay-warnings
verb 3
mute 20
Important! You need to change the subdomain.domain.com in the file to the DNS address you created in Step 5.2. This is how the client knows what computer to connect to when it opens up the tunnel.
Also important! You need to change the INTERNAL_HOME_ADDRESS to the IP Address range in your internal network. Remember when we got your IP address for your Raspberry Pi in Step 3? You’ll use that address here, with a small change. You should change the last of the four number to a ‘0’. For example, if you’re Raspberry Pi’s IP address was ‘192.168.1.50, you’d change the line to:
route 192.168.1.0 255.255.255.0
When you’re done, save the file and exit nano (Ctrl-O, Ctrl-X).
6.6) Networking Setup: Internet Forwarding & Firewalls
I bet you thought we were done with networking setup. You were wrong. Sorry. In order for OpenVPN to forward Internet traffic around correctly, we need to update the firewall rules and forwarding rules on the Raspberry Pi itself. These steps allow the Raspberry Pi to give clients access to both your internal (home) network, as well as the ability to use external internet connection.
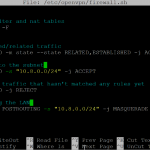
First, create a file that contains the firewall update rules.
sudo nano /etc/openvpn/firewall.sh
Into that file, cut and paste the following:
#!/bin/bash
# clear out the filter and nat tables
iptables -t filter -F
iptables -t nat -F

# permit established/related traffic
iptables -A FORWARD -m state --state RELATED,ESTABLISHED -j ACCEPT

# forward traffic to the subnet
iptables -A FORWARD -s "10.8.0.0/24" -j ACCEPT

# reject forwarded traffic that hasn't matched any rules yet
iptables -A FORWARD -j REJECT

# NAT for accessing the LAN
iptables -t nat -A POSTROUTING -s "10.8.0.0/24" -j MASQUERADE
Save and close the file (Ctrl-O, Ctrl-X).
Now you need to make that file executable – i.e. make it so it can run as a script and actually run those command as if you typed them in to the prompt.
sudo chmod +x /etc/openvpn/firewall.sh
You can test out if you were successful by running the script:
sudo /etc/openvpn/firewall.sh
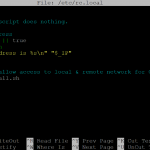
Next, we want to make sure this file runs each time the computer boots. To do that, we’ll modify the rc.local file which is a script that gets run at boot, and we’ll tell it to run our firewall.sh at each system startup.
Open the rc.local file:
sudo nano /etc/rc.local
Just before the “exit 0”, put the following line:
# NAT settings to allow access to local & remote network for OpenVPN
/etc/openvpn/firewall.sh
Save the file and exit (Ctrl-O, Ctrl-X).
6.6 Enable IP forwarding
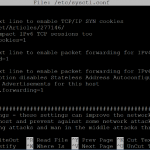
The last step is to tell the Raspberry Pi that it’s allowed to forward Internet traffic from the OpenVPN clients to the external internet – that’s done by modifying the sysctl.conf file.
sudo nano /etc/sysctl.conf
Find the line that reads
#net.ipv4.ip_forward=1
and uncomment it out (remove the “#”):
net.ipv4.ip_forward=1
Save and exit (Ctrl-O, Ctrl-X)
Your Pi is Baked!
Look at that! We’re all done configuring the Raspberry Pi’s OpenVPN server… we’re ready to connect our first client and see if it all worked!
Let’s reboot the Raspberry Pi – we’re done here for now.
sudo reboot
Connecting Remote Clients
Each device behaves a little differently and has different instructions. Here are instructions for the two device types we have running. If you want to set up an Apple Mac or iPhone, you’re going to have to do some googleing to figure it out on your own.
Connecting from Android
- On your Android phone, install the following two apps from the Google Play store:
- ES File Explorer (we’ll use this to get the keys onto the phone)
- OpenVPN Connect (the Android OpenVPN software)
- Make sure your phone is connected to your home’s WiFi and that the Raspberry Pi is turned on.
- Create a location for your OpenVPN files on the phone
- Transfer the required files from the Raspberry Pi
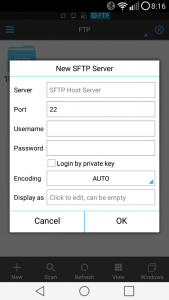
- In the ES File Explorer app, navigate to Network > FTP
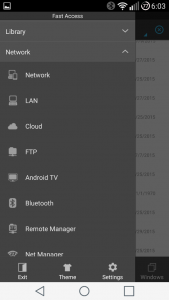
- Click the New button and select sftp
- Enter the connection details to allow your phone to log into your Pi
- Copy the keys to your Android Phone.
- Once you log into your Pi, navigate to /etc/openvpn/easy-rsa/keys
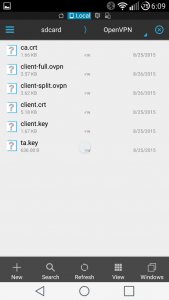
- Copy the files below to the ‘OpenVPN’ directory you created on your phone earlier (Local > SD 0 > OpenVPN)
- Every device will need the following two files:
- ta.key
- ca.crt
- Copy only the two files that are specific to this clientname that you created in step 6.2:
- clientname.crt
- clientname.key
- Rename the two clientname files to:
- client.crt
- client.key
- Every device will need the following two files:
- Copy the client configuration files to your phone.
- Navigate to /etc/openvpn/
- Copy the following two files (or one, depending on your configuration) to your phone, in the same directory we used above ((Local > SD 0 > OpenVPN)
- client-full.ovpn
- client-split.ovpn
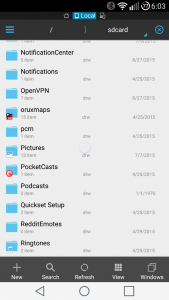
- When you’re done, your OpenVPN directory should look like this:
- In the ES File Explorer app, navigate to Network > FTP
- Launch the OpenVPN Connect app and connect.
- From the ‘…’ menu, select the Import > Import Profile from SD card.
- Navigate to your OpenVPN folder, and select one of your two connection files (client-full.ovpn or client-split.ovpn).
- Connect! – Hit the ‘Connect’ button. Once connected, you should see this:
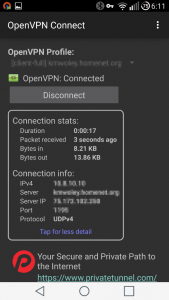
That’s it. You should now be connected. Hopefully you won’t need to do any troubleshooting.
Obviously, the best way to test is to see if you can reach something on your internal network while you’re on a remote network. You can use an app like Ping Tools to do a ‘Trace Route’ to Google.com to see the exact path your network traffic takes to reach it’s destination. On a full tunnel, you should see the traffic go through your home network before it goes anywhere else. If you’re on a split tunnel, you can see how different traffic to different services goes down different paths.
Another thing you can check is your external IP address – if you’re using the Full Tunnel, you search Google for ‘whats my ip’ and Google will tell you your external IP address. If you’re not on your home wireless (on your mobile data plan, for example) the answer to what your external IP should change depending upon if you’re connected or disconnected.
Connecting from Windows
Note – these instructions are for Windows Vista and beyond. I’ve used them successfully on Windows Vista, Windows 8, and Windows 10.
- On your Windows client, install following two programs:
- Make sure your computer is connected to your home’s WiFi and that the Raspberry Pi is turned on.
- Transfer the required files from the Raspberry Pi
- Create a directory on your Desktop called ‘keys‘. This is where we’ll copy the keys temporarily – it’s full address will be C:\Users\<username>\Desktop\keys
- FileZilla is not able to directly copy the files into their final location, since it doesn’t have Admin privileges. We’ll copy them to the Desktop and move them to their final place later.
- Launch FileZilla
- Enter the connection details to allow your computer to log into your Pi into the “QuickConnect” bar.
- Server: the IP address of your Raspberry Pi
- Username: “pi”
- Port: 22
- Password: the password you’ve been using to log into your Pi
- Copy the keys to your Windows computer
- Once you log into your Pi, navigate to /etc/openvpn/easy-rsa/keys
- Copy the files below to the C:\Users\<username>\Desktop\keys
- Every device will need the following two files:
- ta.key
- ca.crt
- Copy only the two files that are specific to this clientname that you created in step 6.2:
- clientname.crt
- clientname.key
- After they’re copied to the computer, rename the two clientname. Tip: you may have to open the C:\Users\<username>\Desktop\keys directory in the Windows File Explorer to rename these).
- client.crt
- client.key
- Every device will need the following two files:
- Copy the client configuration files to your computer.
- Navigate to /etc/openvpn/
- Copy one of the two following files to the same directory you put the keys into (C:\Users\<username>\Desktop\keys)
- client-full.ovpn OR
- client-split.ovpn
- Tip: If you know you’re going to use both types of connections, then feel free to copy both files and you can choose at the time of connection. However, I recommend picking one or the other – OpenVPN will pick up the single file and use it as the default connection if only one file is in the directory.
- When you’re done, things should look like this:

- Open Windows File Explorer
- Navigate to C:\Users\<username>\Desktop\keys.
- Move the files to C:\Program Files\OpenVPN\config.
- This is where OpenVPN will look for the files by default.
- Finally, you may want to delete your ‘keys’ directory from the Desktop.
- Create a directory on your Desktop called ‘keys‘. This is where we’ll copy the keys temporarily – it’s full address will be C:\Users\<username>\Desktop\keys
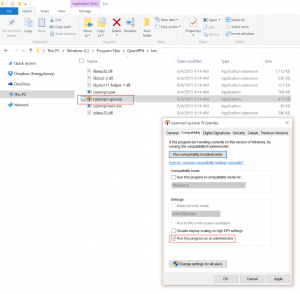
- Set the OpenVPN client client to run as Administrator.
- Launch the OpenVPN program
- Go to the Start menu, find OpenVPN GUI, and launch the program. It should ask you for elevated permission to launch.
- Once it starts, it places an icon in your task tray (in the lower, right hand corner of your screen)

- If you only have one .ovpn file in your config, you can double-click on this icon and it will open the connection. If it connects, you’ll get a notification that it has connected and the icon will go green.

- If you have two (or more) .ovpn files in your config directory, you’ll have to right click and select which configuration to use.
Some Windows-specific settings:
Sometimes Windows can be a pain. On at least one of my machines I’ve had to add the following to the end of my client configuration to get the connection to work properly:
# goes at the end of a Windows client.ovpn file
route-delay 5
route-method exe
ip-win32 netsh
Try adding the above if you get a “Warning: route gateway is not reachable on any active network adapters” when connecting from a Windows machine.
Debugging
If things go wrong, Google is your friend. I wrote these instructions in the hopes of saving others the time and effort it took me to get a good, secure configuration together. Both the OpenVPN forums and the Raspberry Pi forums are great resources for debugging.
Sources & Resources
For reference, here are the various resources I used when figuring this out for myself:
- OpenVPN HOWTO
- Hardening (making things secure)
- Forum Discussion on finding the best cipher (encryption) settings
- How to setup a Raspberry Pi VPN Server – these were really great instructions, but were not exactly right to get the Android/Windows machines to forward traffic correctly.
- [howto] Install latest openvpn and easyrsa3 – some generally good information about setting up the firewall/iptables. You could follow these instructions to get the latest OpenVPN on your machine, since apt-get doesn’t always install the latest version.
- Making the Android Phone even more secure with the Android Keychain – I followed these instructions for one of the phones and it worked well, but not sure how much I care. If I lose my phone, I’ll just delete all my keys and regenerate them.
- TorGuard – OpenVPN error: Warning: route gateway is not reachable on any active network adapters – Helped me debug a Windows OpenVPN error.



I am so flattered that you actually thought I would understand this
Not really, David. I think a lot of the family is still subscribed to the blog from my bike trip… but I still post some really geeky things. :)
Hi, you have a good and well detailed process here. I’m wondering if you could give me some advice with the VPN I’ve set up. It is using a very similar process and it gives me internet access but I can’t access the home network, e.g. I can’t use SSH (Putty) through the VPN from my Windows PC to access the PI. The difference in the process I followed to yours seems really to be just the firewall rules. Your firewall.sh code is much longer than the blog I used that only had this text “#!/bin/sh
iptables -t nat -A POSTROUTING -s 10.8.0.0/24 -o eth0 -j SNAT
–to-source IP_OF_PI”
Do you think if I replace that with your code it might give SSH access?
Thanks in advance
It is likely that the firewall forwarding rules are your problem – the various iptables commands are responsible for routing the traffic to the right place once it reaches your VPN.
To debug what’s going on, you can use a trace route commmand from your client to see where the connection is getting blocked.
Also check the logs of your client to make sure it’s actually connecting without error. Windows clients can be tricky in my experience.
Thanks for the advice.
Thanks for taking the time to post this. Are you running your VPN from a 1st generation Pi or 2nd?
First generation Pi – Specifically the 1st Generation Model B.
Can’t connect. When I run nmap -sU -p 1194 localhost, it tells me this:
PORT STATE SERVICE
1194/udp closed openvpn
I have tried to open the port on a previous installation, but I didn’t do it right. I could connect, but I couldn’t actually do anything. Can anyone tell me how to open the port properly?
Marco – it’s hard to help without knowing what you did or didn’t do when following these instructions. Debugging VPNs can be a royal pain, and I’m not a networking expert so I can’t help much in terms of troubleshooting. I hope you’ve been able to google yourself out of a jam.
You have a mistake in your configuration:
# configuration of the VPN’s IP addresses
server 10.8.0.1 255.255.255.0
ifconfig-pool-persist /etc/openvpn/easy-rsa/ipp.txt
“server” should point to a subnet and not an IP address. So, for your example, it should be:
# configuration of the VPN’s IP addresses
server 10.8.0.0 255.255.255.0
ifconfig-pool-persist /etc/openvpn/easy-rsa/ipp.txt
I ran into the same problem. Found it, fixed it, and then was about to leave a comment and saw that this comment was already here.
Thank you for you help and I made it!
Thank you! I edited the post to fix things up. I introduced the typo inadvertently – I could see that being a big hassle for someone.
when doing ./clean-all i was getting permission denied even if i was on root #
this solved the problem.
sudo chmod -R a+x .
Any recommendation on cameras? I’m new to Raspberry Pi and don’t know what kind of connection is needed. Thanks
I’m really happy with my DLink webcam (http://www.amazon.com/D-Link-Wireless-Surveillance-mydlink-Enabled-DCS-932L/dp/B004P8K24W). The audio and picture are good enough. You can get a nicer one if you want, but the price/quality was perfect for me.
Hi Kevin and others
I tried but was not able to get OpenVPN running on a new v2 Pi running Jessie. I did find an auto-install of OpenVPN on Github, which works flawlessly. It performs the full install, builds server and client certificates and drops the .ovpn file in your Pi folder, ready to export to your windows or other client pc. It works flawlessly. I thought this might be useful so I am linking to it here:
https://github.com/StarshipEngineer/OpenVPN-Setup
Thanks
Great resource! Looks a lot easier than doing all the scripting yourself. I didn’t take a look a the config it actually installs – I’d be curious to know what settings they pick.
Is it possible to add an access server to openvpn?
Probably. OpenVPN enables a lot of different services.
Really like your post.
Thanks for taking the time to share.
I have a question / problem. In section 5.2 on update your domain with your external IP address you refrence the use of a cron example.
My problem is that I already have a domain name that I have never used and want to use it. I have tried to find cron examples like the one you show so I can us my domain name and have it refreshed to my dynamic IP.
Do you happen to have any suggestions how a 66 year old cut-and-past Openvpn user can find an example to do this. I really do not want to learn how to write scripts at my age.
Thanks and thanks again for taking time to write your post.
CW
Wow. This worked perfectly for me..Great. Every other tutorial failed dismally but yours worked perfectly. Thank you.
Let me start by saying thank you for the good write up. I setup my raspberry vpn and I’m able to connect to my lan. I am able to connect to the internet, however, I am not able to monitor my cameras with tinycam pro. I checked the camera settings and they successfully ping but I am not receiving any frames. Please help.
Hi,
Are you able to tell us how to setup a tinyCam Pro configuration in order to access your PI? Did you install anything else to get it to work on the PI? My tinyCam Pro settings are …
Camera vendor:Linux
Web port:80
without success.
-Rich
I’d focus on getting TinyCam Monitor setup to work with your camera on your home wifi before trying to get the VPN setup. After that’s setup, you shouldn’t have to change anything in TinyCam.
VPN isn’t the issue. I have had OPENVPN working for over a year. I just have not been able to use TinyCam Monitor app to work with the standard PI cameras even when I am at home with my WIFI. It works fine with my Foscam IP based cameras .
Hi Kevin,
I also concern secure access from my phones to my ip camera.
After setup the VPN at home, I would like to know the tinyCam apps in my phone to view the video feed from my ip camera at home is encrypted?After my phone connect to my home VPN, the video feed connection between tinyCam apps and ip camera is using local network(LAN) or internet network?
Thanks
How do you do split VPN? i.e. route all traffic through VPN but things like PS4/Game traffic outside of VPN